Hebrew Language Learning Game
Unlocking Your Imagination
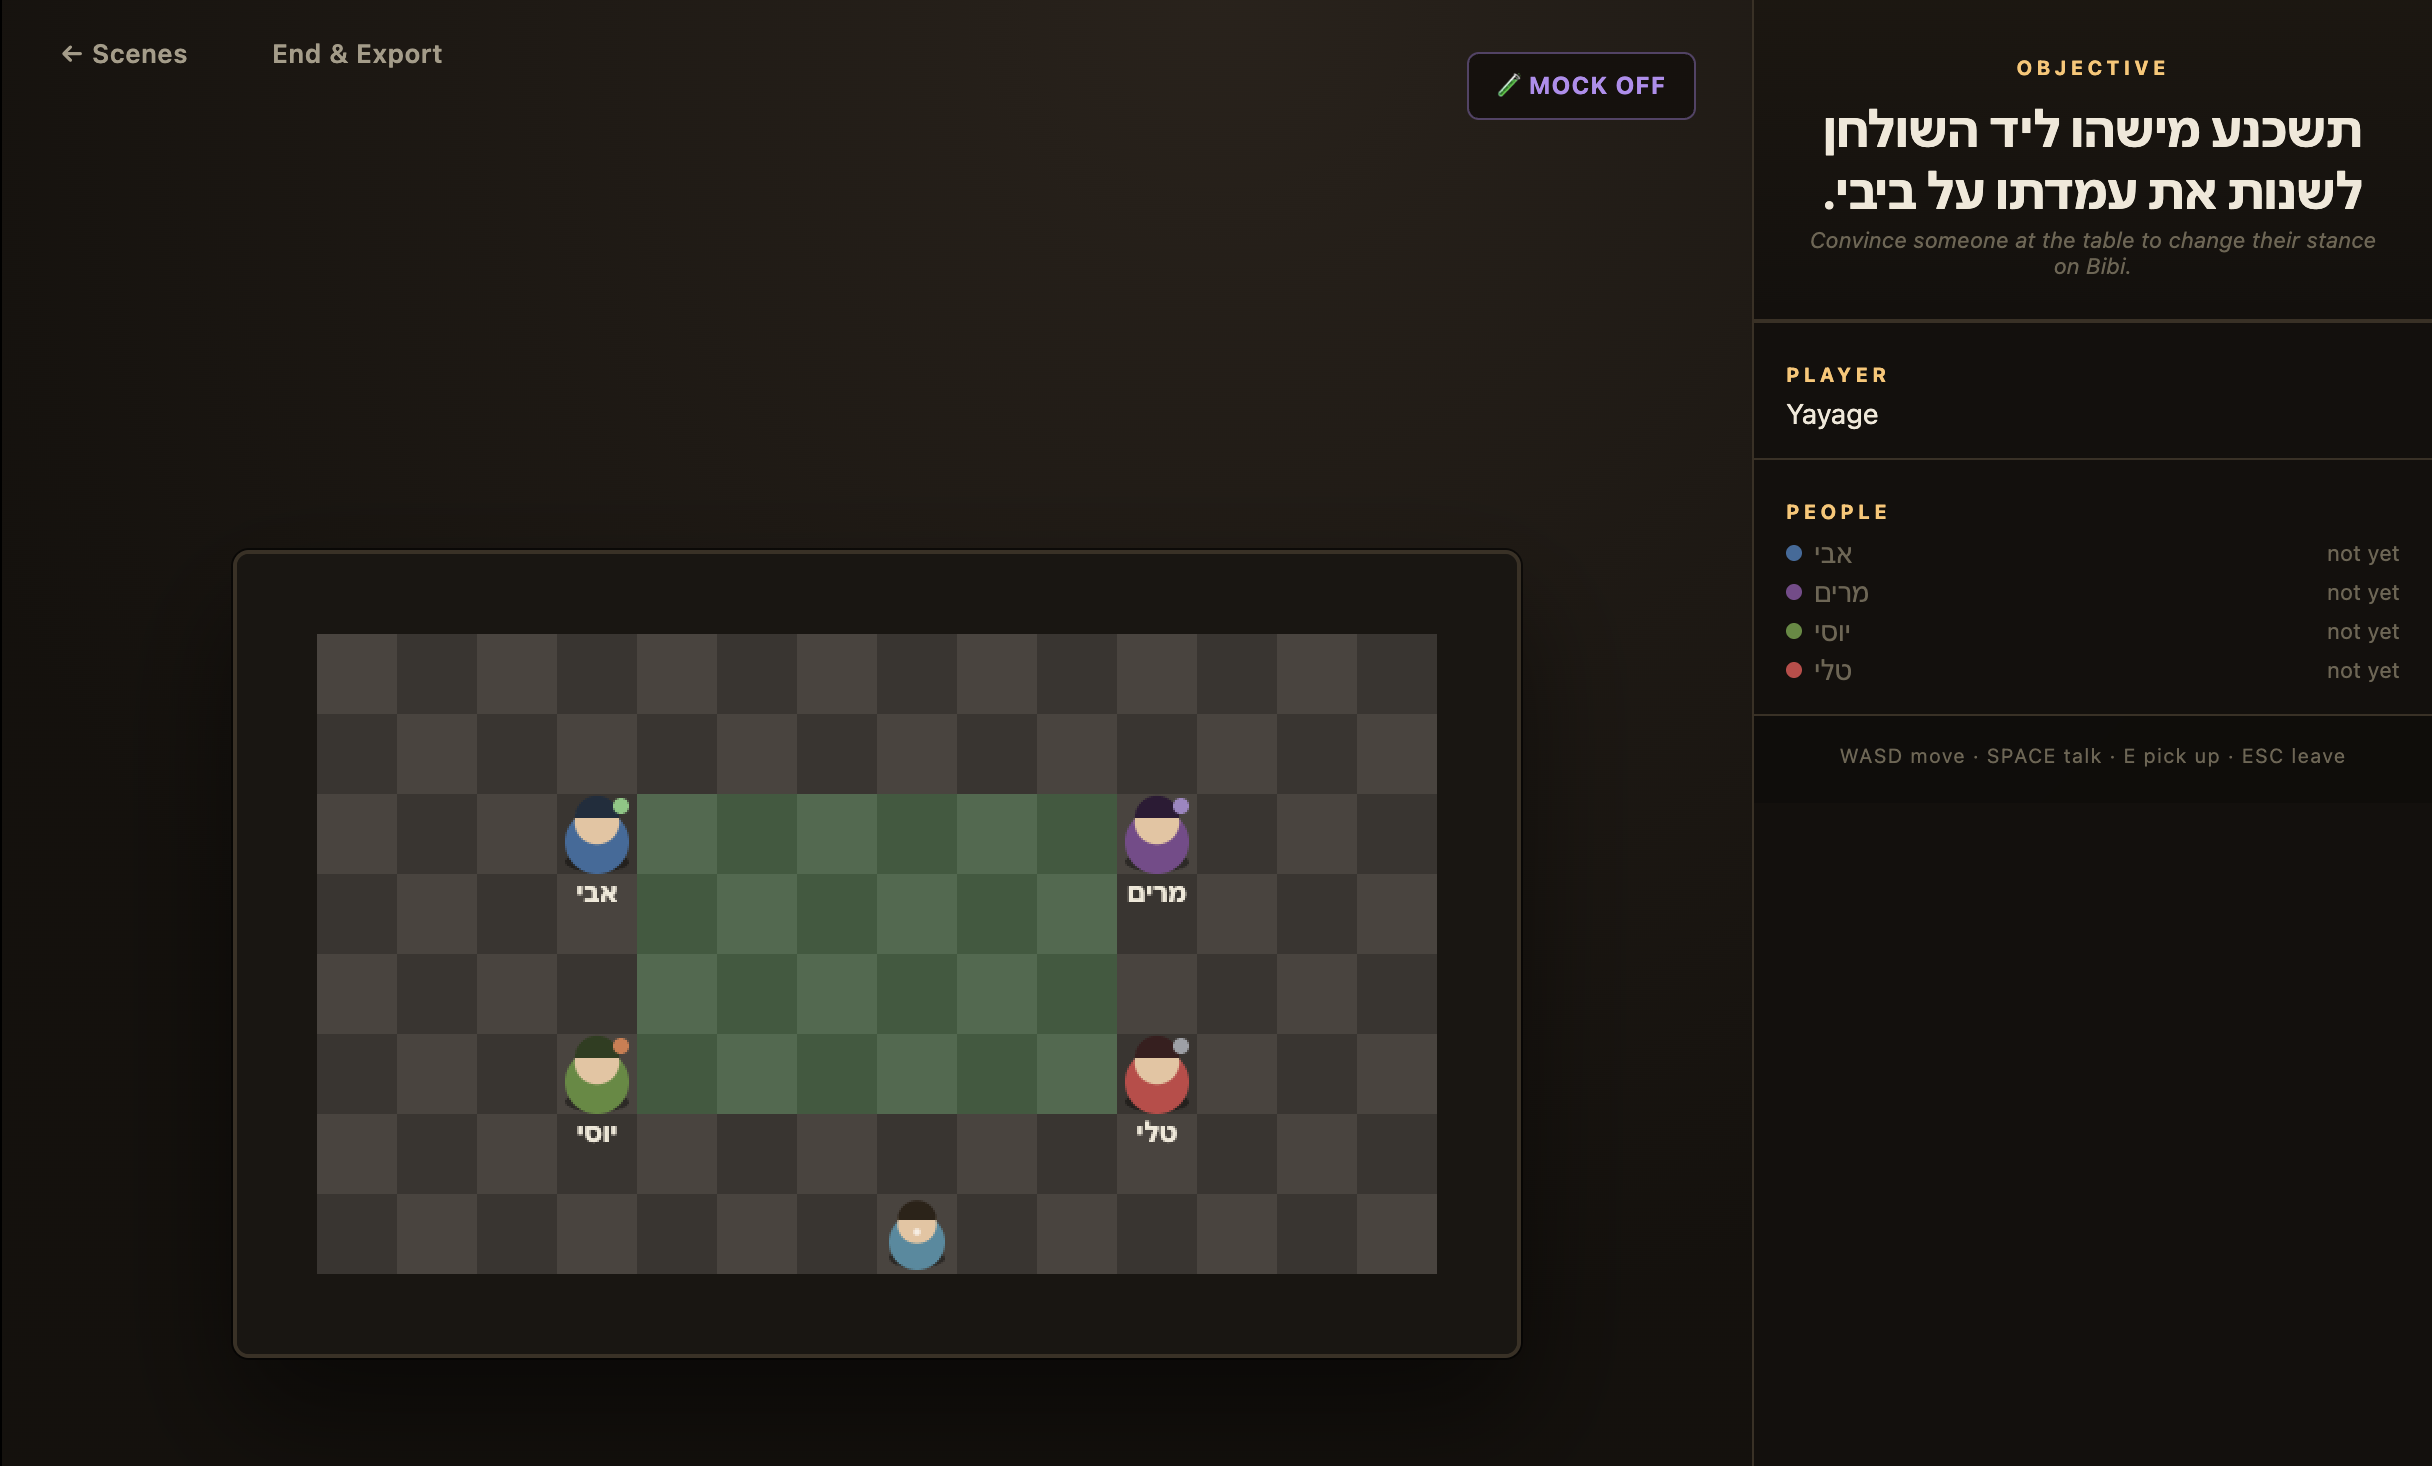
This game is designed to allow teachers to use their imaginations to invent immersive scenarios for their students to practice their language skills.
This is a guide to using the Hebrew Language Game from end to end. The basic workflow for a teacher looks like this:
- Close your eyes and imagine a real-world scenario that you want your students to practice. Let your imagination do a lot of the work here - the clearer of a picture you have in your mind, the better this game works!
- Use the SKILL file to create this scenario and import it into the game website.
- Test the scenario using a Mock Mode (with no LLM ie. no token cost) and make any changes you want in the editor.
How does this even work?
A traditional game like Pokemon (which was written with traditional software) uses hard-coded rules. For example, when your player talks to a character in the game, there is a pre-written script. The user might have a few dialog options, but each of those options has a predetermined sequence of hard-coded responses.
Meaning, if I play Pokemon twice and I pick the same exact dialog options both times, I will get the exact same responses.
This game is different. The level is designed to include certain descriptions of things, written in a mix of plain language and structured code. That means that the game can mix both structured code and LLM calls to create a more immersive experience. The code still uses hard-coded rules: for example, picking up a 5 Shekel coin will remove that coin from the floor and place it in your inventory. But now, we can also incorporate LLMs that allow us to remove some of the rigidity of dialog options.
What this means in practice is that when you talk to a character in the game, you are actually prompting an LLM. When you type something into the chat, the LLM first gets their own character’s context injected as the system prompt, then they will see your chat message history. For example, if you go up to a character Yulia who is a hairdresser, and type:
Hi, how are you doing?
The LLM will see the following prompt:
SYSTEM: You are a hairdresser named Yulia. You are cheerful, hard-headed, and loves to talk about your family.
USER: Hi, how are you doing?
This is a simplified example, but it illustrates what’s happening: your chats with the AI characters actually includes facts about the scene that you don’t need to explicitly tell it - the AI knows because that’s how the scene is defined!
In practice, the real AI will see much more than just their own personality: they also get handed real facts about the world, such as locations of the objects of the scene, what relationships they have with other characters, the lore of the setting, and other things. When the player achieves an in-game objective, an event will fire. This means that “something happened” in the game to advance the plot. We’ll see how this works in Section 3.
How do I use it?
How does this work in practice? Let’s walk through an example.
1. Build a scene
The game’s levels are all specified in a custom format called a SceneDefinition. This is a technical description of the entire scene, including:
- the level of the user (beginner, intermediate, advanced)
- the success criteria and objectives of the scene
- descriptions of the setting
- the map tiles (where the walls and grass are)
- a list of NPCs (Non-Playable Characters, ie. the AIs)
- objects in the game (optional, ie. the 5 Shekel coin in the Bakery level)
- a list of concepts
- a list of triggers
If you want to see an example of what this SceneDefinition looks like - here’s an example.
It might look like a bunch of garbled data, but it’s actually an organized set of key-value pairs, encoding facts about the scene.
But making humans write this file manually would be a bad use of time, so I’ve added 2 better ways to create it.
One way is through the editor that’s built into the site. This is great if you want to make small changes to an existing scene, but it can be cumbersome (though entirely possible) to create a scene from scratch using the editor.
So that’s why I also created the SKILL file. Go to this link to see the SKILL file:
https://github.com/yuvaltimen/hebrew_game/blob/main/.claude/skills/scene-builder/SKILL.md
You can read through it, but what it’s basically doing is providing a ton of technical information about how to construct the SceneDefinition file, given a prompt.
If you’re using Claude, go ahead and download this skill into the Claude Skills directory (details here).
If you want a quick way to start, you can actually copy the contents of the SKILL file and paste it into ChatGPT, along with your prompt.
IMPORTANT:
Make sure you describe your scene BEFORE pasting the content of the SKILL file. The more detailed of a prompt you give, the better the SKILL is at taking what’s in your brain and bringing it to life.
Make sure you convey your intent for what the students should be training:
❌ Bad:
Give me a scene where the player has to ask a bunch of questions.

<pasted SKILL file content...>
✅ Good:
Give me a scene where the player practices how to ask personal questions to a few different characters.
The characters should not volunteer information, but rather the player should demonstrate that they can follow up on specific threads of conversation.
The player should be able to ask specific questions to learn the name, age, and occupation of at least 2 characters.

<pasted SKILL file content...>
The main difference here is that you, the teacher, are conveying your intent for what you want the level to accomplish. Giving it specific information is good, but if you don’t, the SKILL will try its best to use common-sense.
Now, the SKILL should have produced an output SceneDefinition. Either copy it or save it to a file somewhere. We’ll need it in the next step.
2. Upload the SceneDefinition to the website
Let’s upload the scene to the website so we can play test it. Go to https://hebrew-game.onrender.com. The app might be asleep, so it may take a minute for it to wake up. After a moment, you should see a screen like this:
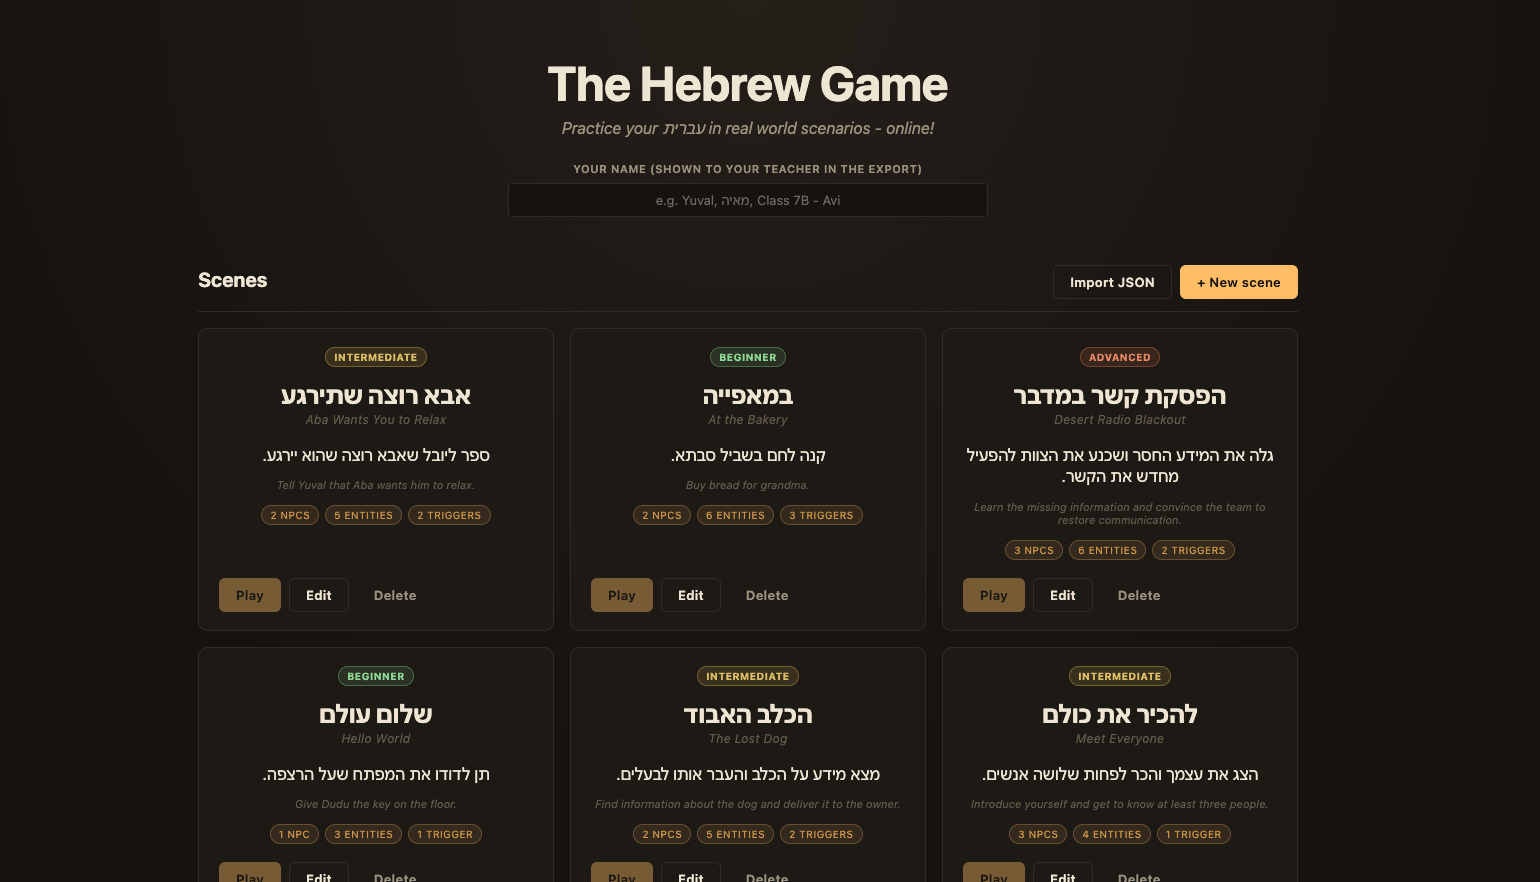
In the top right, you can see two buttons: Import JSON and + New Level.
Click on Import JSON and either paste in your SceneDefinition output or upload the file from your computer. You should see a message that it validates cleanly and is ready to import:
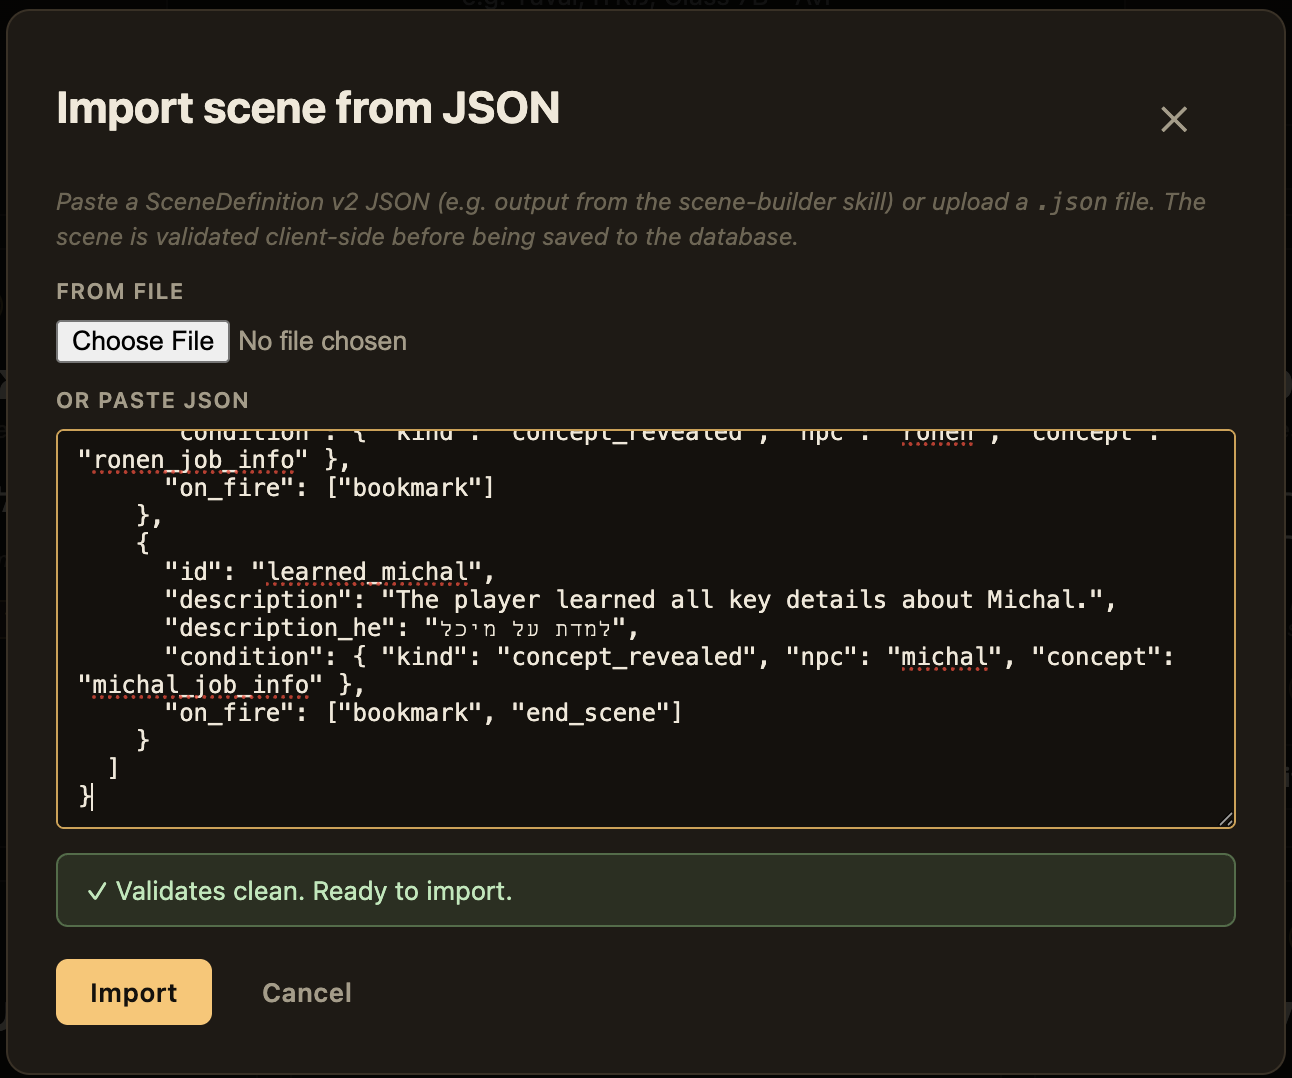
Click Import and you can now test the scene.
3. Test the scene using Mock Mode
First things first, you’ll need to enter your name above, otherwise you can’t play. This is where your students would enter their names:
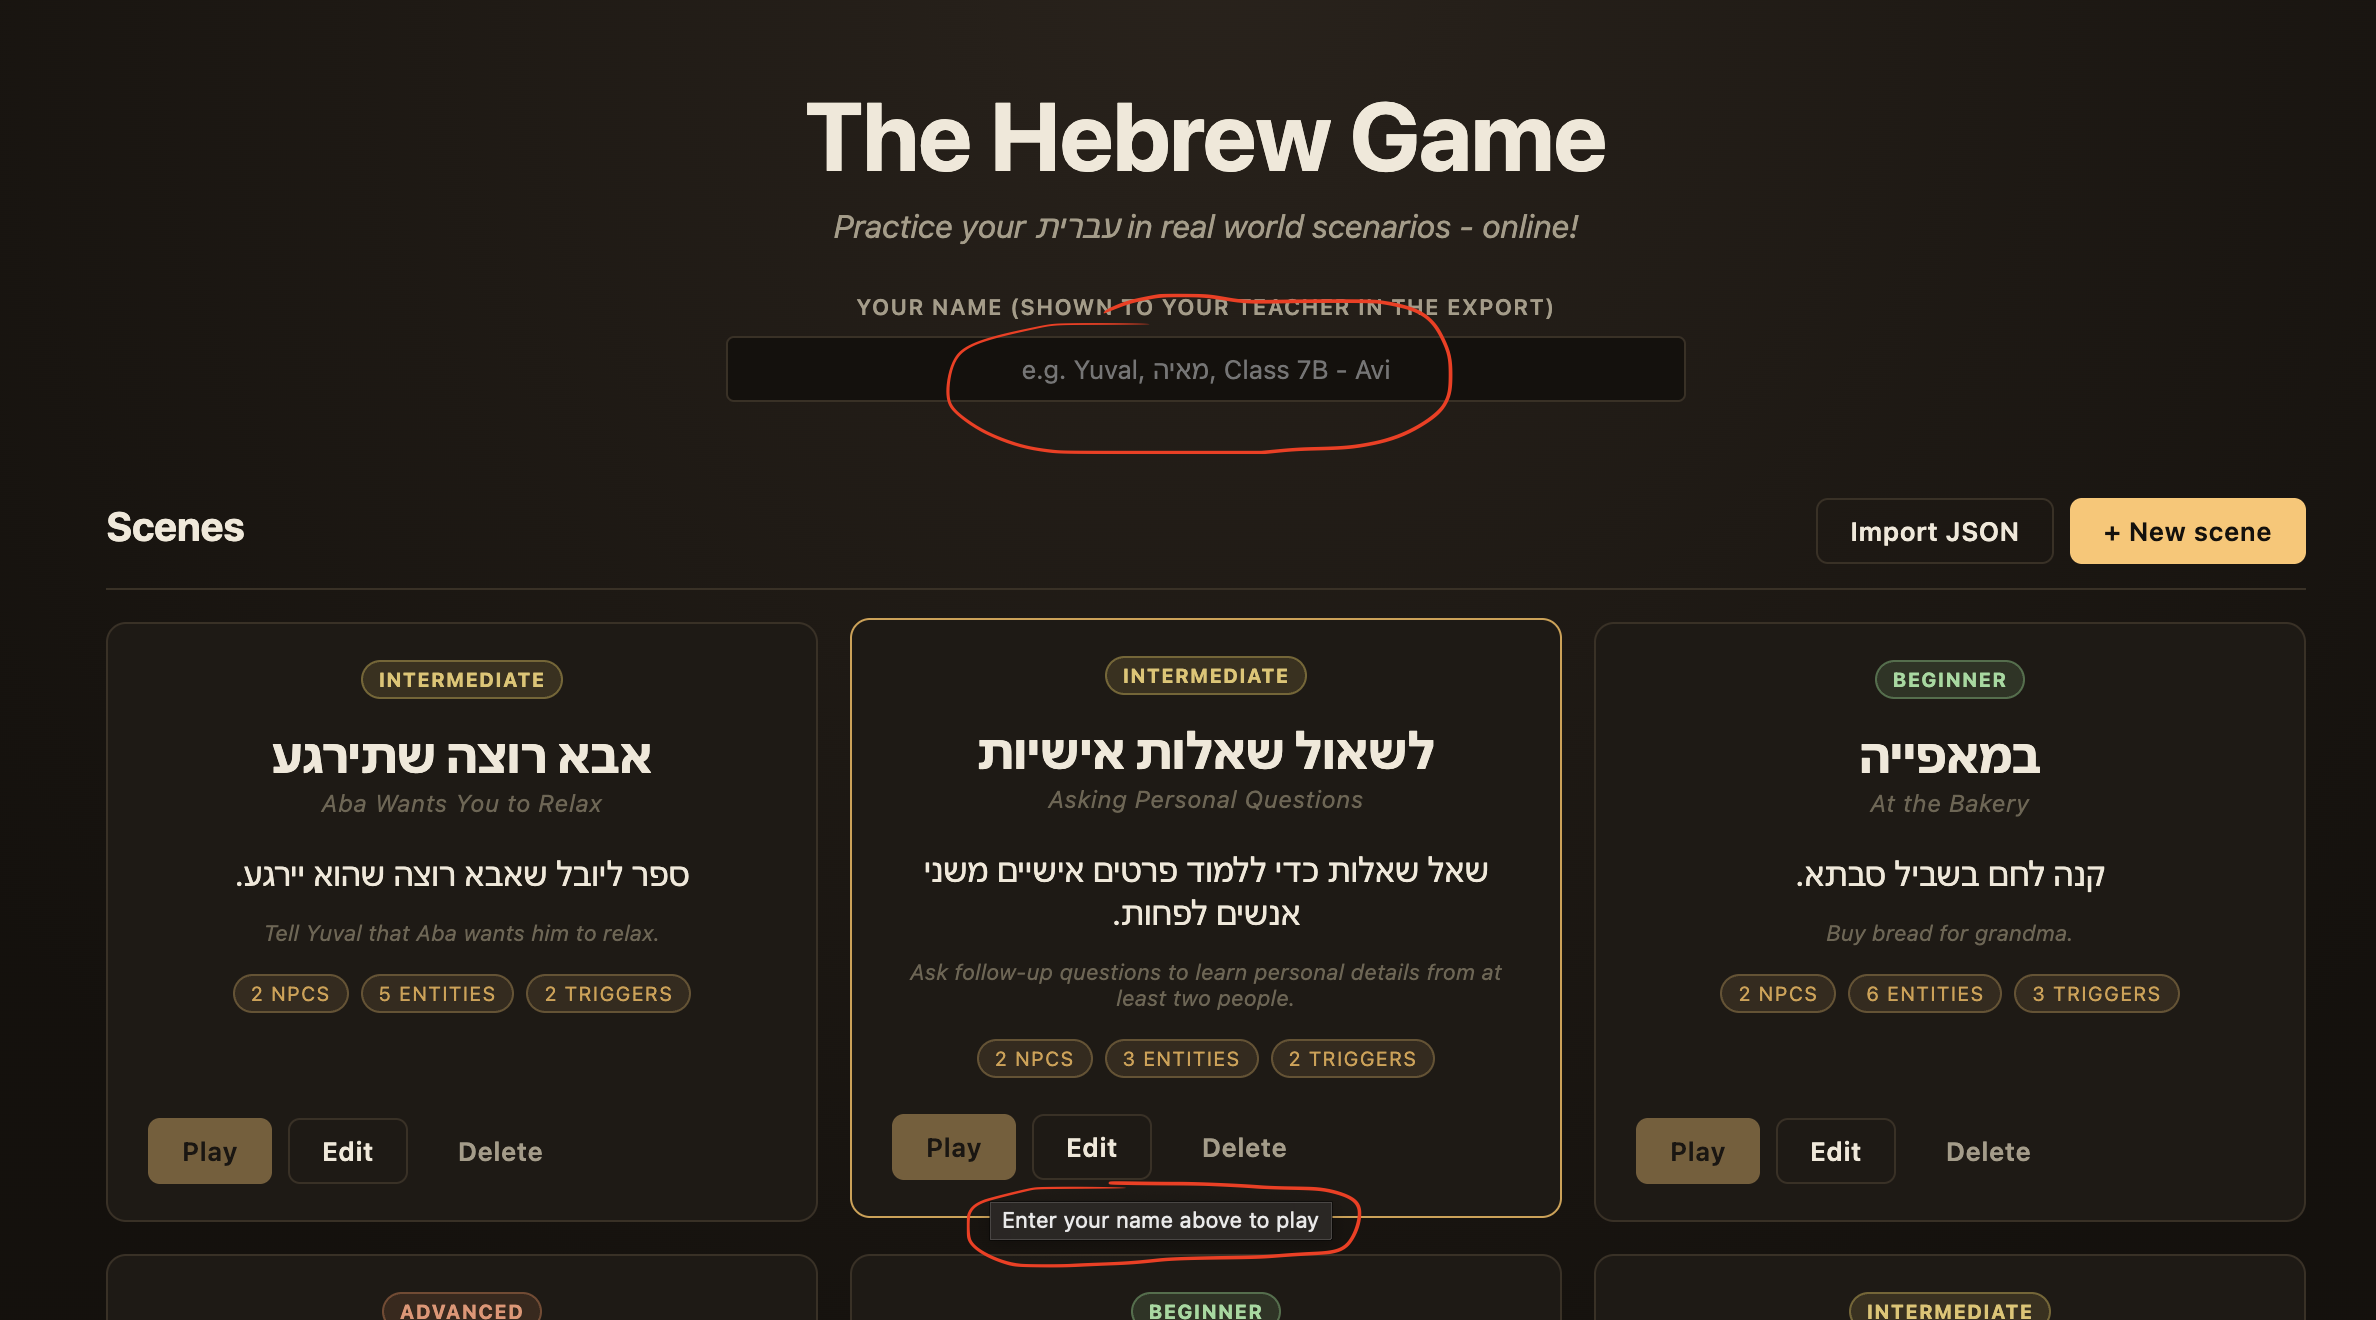
Now click Play and enter your scene!
By default, each scene uses Mock Mode. This is a way to enable the teacher or level designer to test that the mechanics of the scene work, without using burning through real LLM tokens. Mock Mode uses keywords to match inputs and returns hard-coded text, rather than letting an LLM decide.
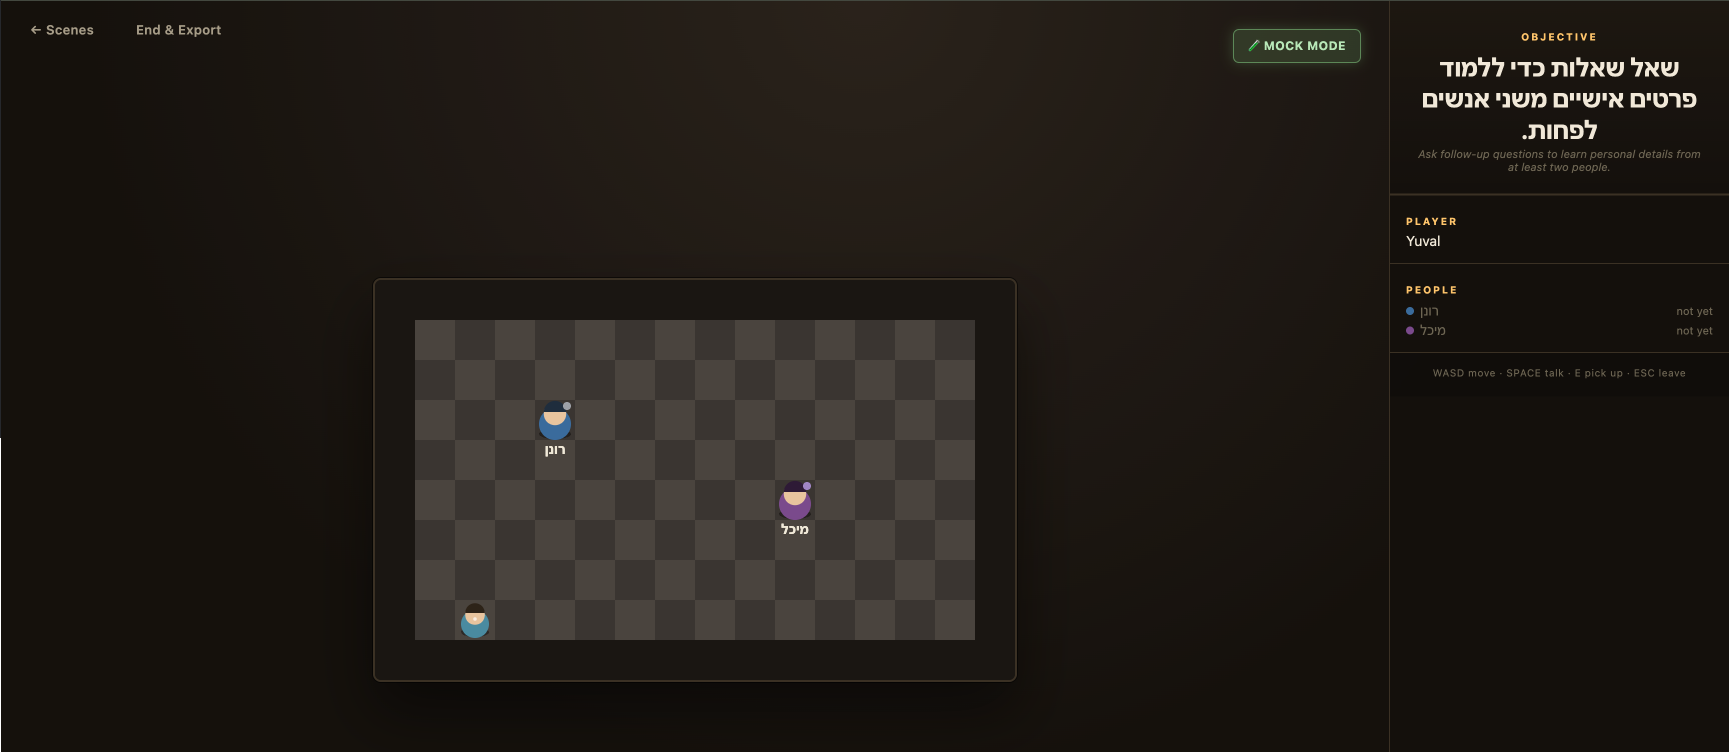
You can play the level in Mock Mode to ensure that the events you expect happen when you expect them to. For example, in this case, you expect that when a student learns Michal’s age, an event will fire. So go talk to Michal and ask her age:
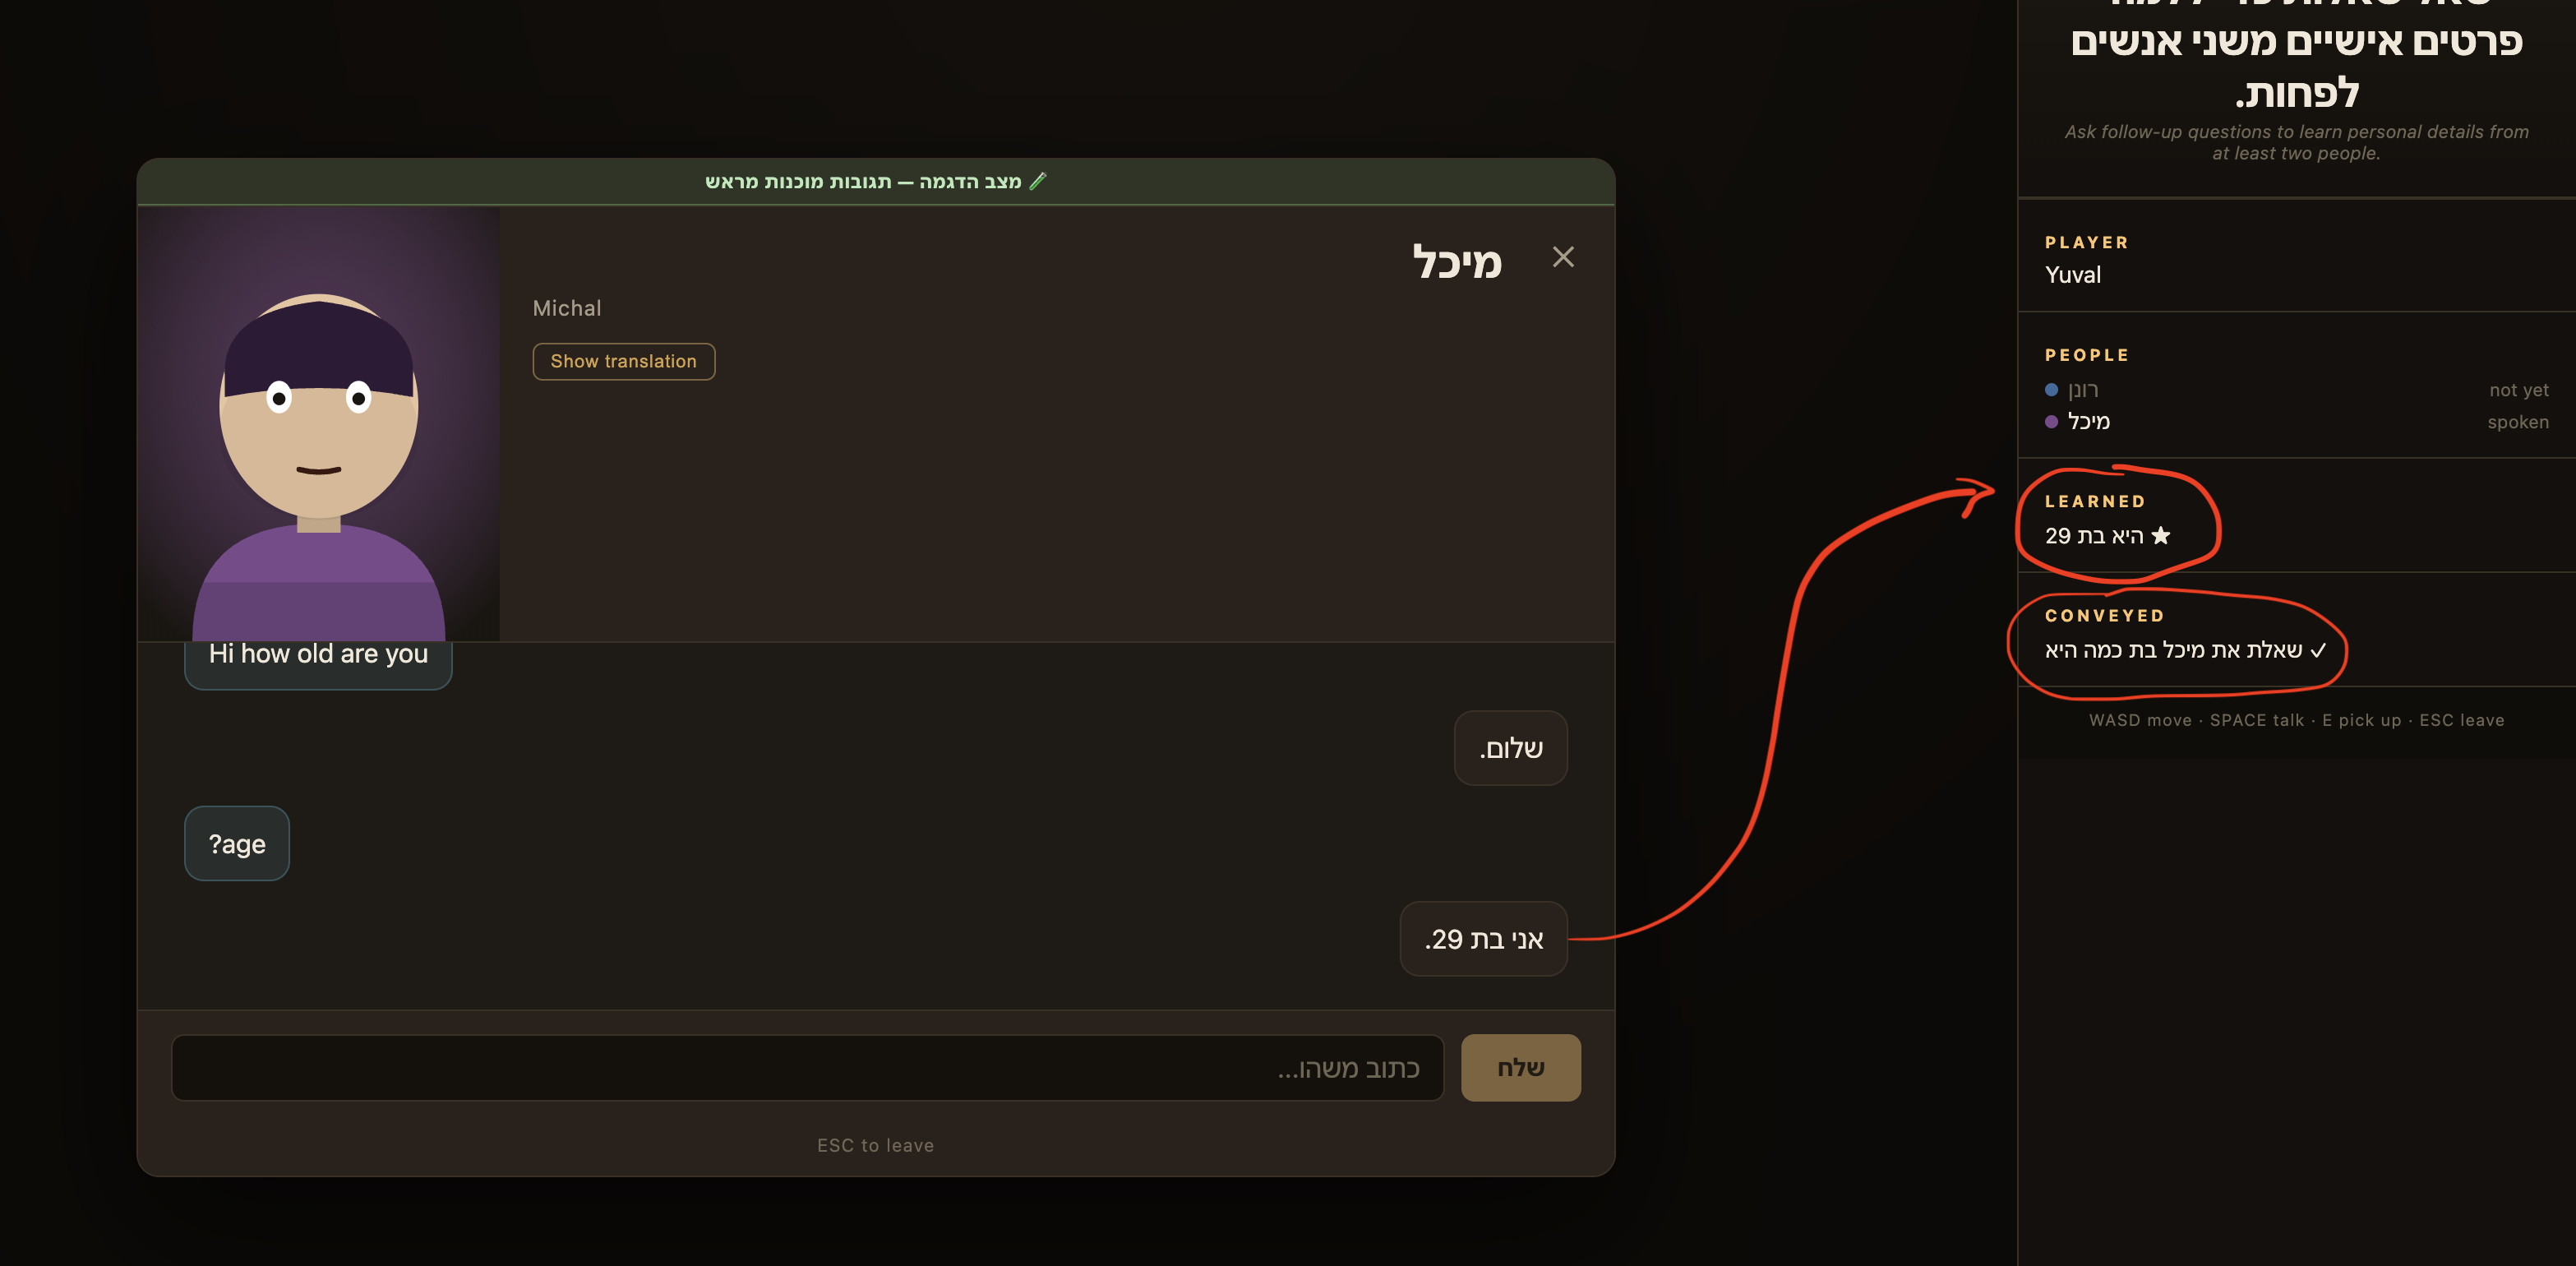
Notice that after she reveals her age, the side panel is now populated with 2 new sections: a Learned fact about the world, and a Conveyed concept, that the student was able to inquire successfully about the age.
This side panel is to help the student see all of the events that happened in this level. This is a simple case, but for a more complex scenario where you need to remember facts, this can be a helpful way to persist information across chat. For example, in the level called “הפסקת קשר במדבר”, the player needs to:
- Discover the correct radio frequency
- Give that radio frequency to the correct character
The side panel will show the player all the facts and concepts that have triggered so far.
IMPORTANT:
Notice in the screenshot above - my first question was “Hi how old are you”, but that didn’t trigger the fact. Only when I asked “age?” did it work.
This is because we are in Mock Mode, so the keywords that trigger includes “age” but not “old”. Every character comes with existing mock keywords to test with, and in the next section, we’ll see exactly how to find these mocked responses to make our testing easier.
4. Edit the SceneDefinition in the editor
Finally, we’ve gotten to the part where we noticed something about the level that we want to change. Of course, if there are a lot of issues with the scene, it might be easier to just delete the scene and use the SKILL to create the scene from scratch with a better prompt.
But if there’s only some small changes that we want to make, the Editor is the easiest option. Go back to the home screen and click the Edit button on the scene. It should open up an Editor that looks like this:
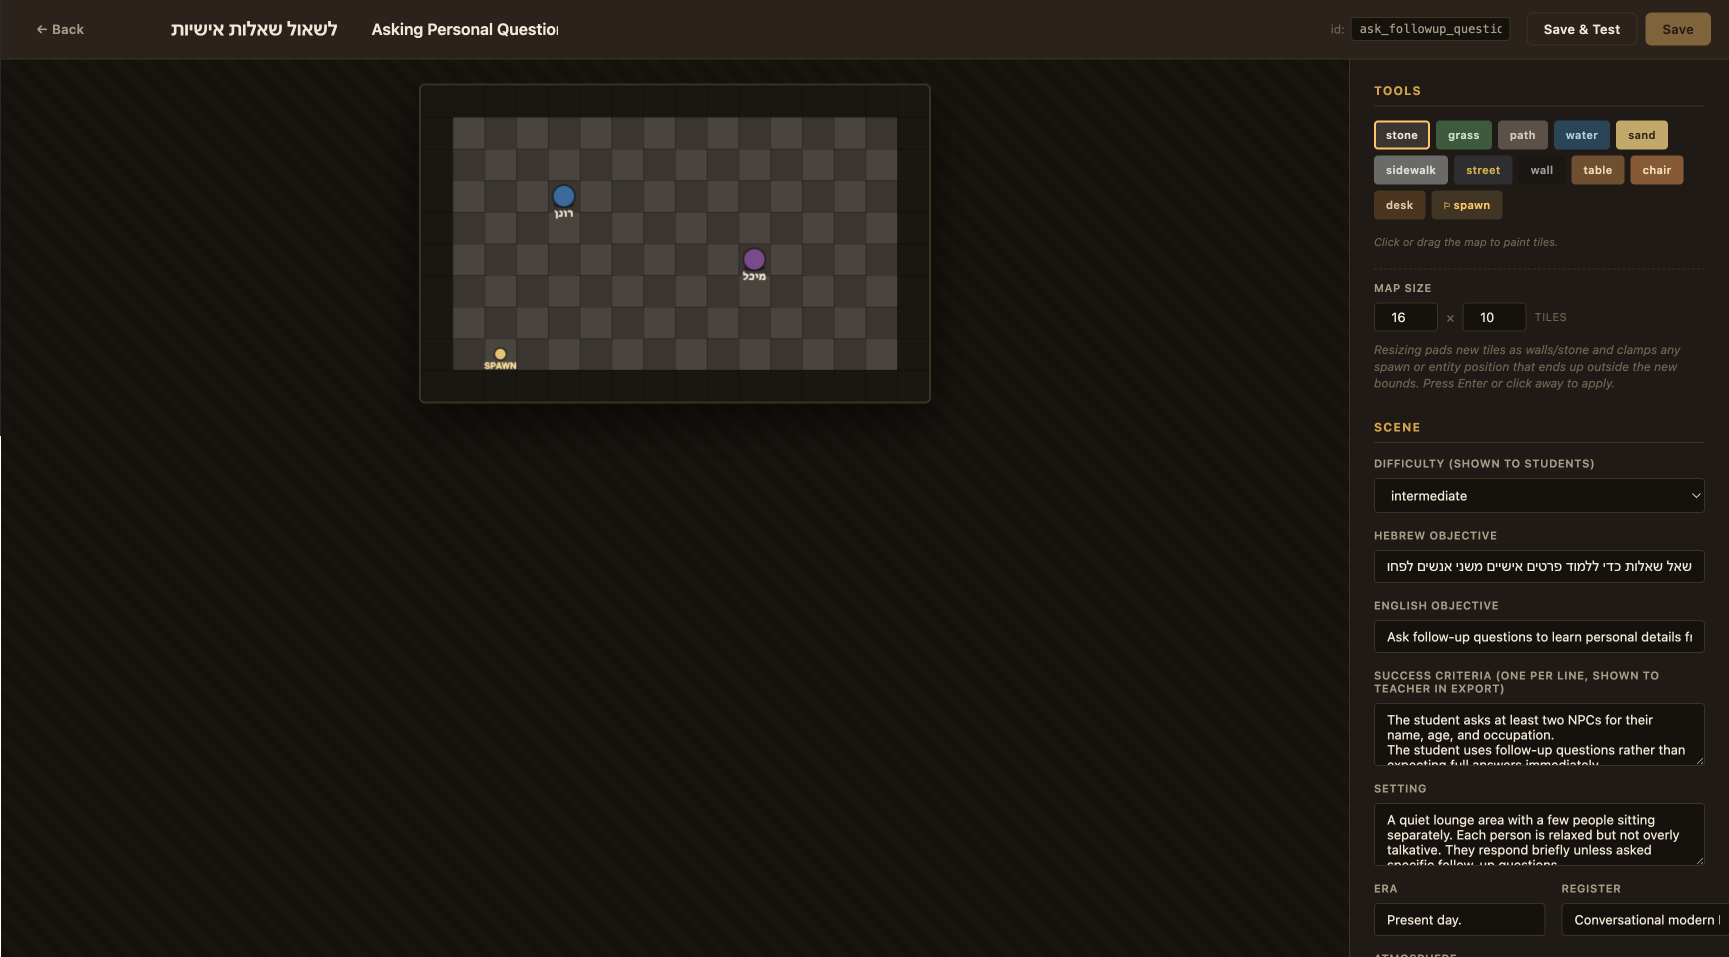
First lets take a quick tour:
- On the top you can see information about the level - the title, the
idof the level, and buttons to save your progress - In the middle, you can see the map with 2 NPCs (Ronen in blue, Michal in purple), and a Spawn point (where the player starts)
- On the right you see a panel with all the information about the scene
The panel on the right contains all the information of the scene. It comes directly from the SceneDefinition that we imported into the
website, and it was actually generated using the SKILL file. Take a moment to read through some of this info - all of it gives the LLM context about the world and will actually determine how the LLM responds to the player’s dialog.
Let’s go by section:
Tools
This is just tiles we can place on the map to edit the setting and make our world feel like the setting we want to convey. An important note here is that the player cannot walk on wall or water tiles.
Scene
We see the difficulty level, the objectives, the success criteria, the setting, era, register, and atmosphere. Feel free to update any of these as you see fit for your scene.
Entities
Entities are the “things” in the world that the AIs know about. Entities are the meat of the game, because we can define Entities in ways that make the setting feel rich and allow the game mechanics to work. When we create an Entity, we can add descriptions and attributes to it, which allows the AI to understand how the world works according to our scene.
It’s worth reading the attributes and descriptions of Entities. They should be mostly self-explanatory. In most cases, you’ll probably stick to mostly using NPCs and Objects, but it’s worth knowing about all the Entity types.
An Entity can be many things:
- an NPC (Non Playable Character, ie. an AI)
- an Object (ie. the 5 Shekel note on the floor)
- a Location (some important place to the story - for example, the city some NPC grew up in, or the farm next door)
- a Relationship (between two NPCs - this allows drama or interpersonal dynamics to arise)
- an Event (some event that happened - this allows drama, such as the underlying reason for some NPCs to have a certain relationship)
- Lore - this is just backstory. For example, this might include backstory about some Event that caused two NPCs to develop a bad Relationship
IMPORTANT:
Every NPC comes with a set of pre-configured Mock Mode responses. You might want to see which keywords trigger those responses, that way you can test the game by using these exact keywords.
To do this, go to the Editor, scroll to the Entities section, click on the NPC, and look for the section called Mock responses:
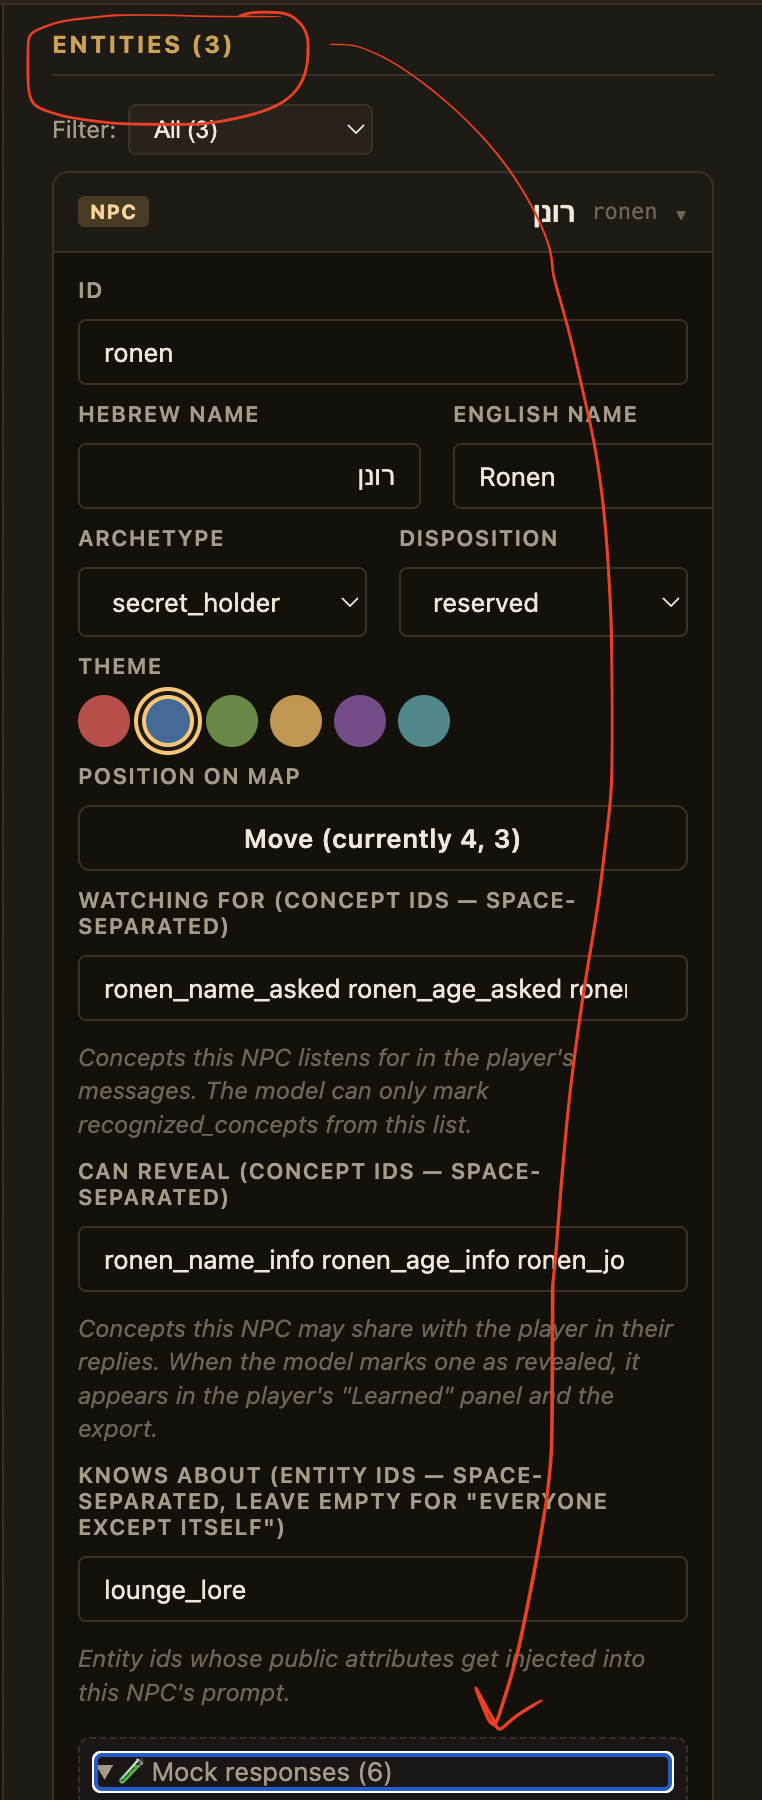
If you click to expand this section, you’ll see multiple responses. You can see that for each response, there’s:
- a set of comma-separated keywords that trigger this response
- an optional
Recognized Conceptthat would be triggered if using a real LLM - ie. what concept the LLM would recognize the player is trying to convey - an optional
Revealed Conceptthat would be triggered if using a real LLM - ie. what fact the LLM would respond with to the player
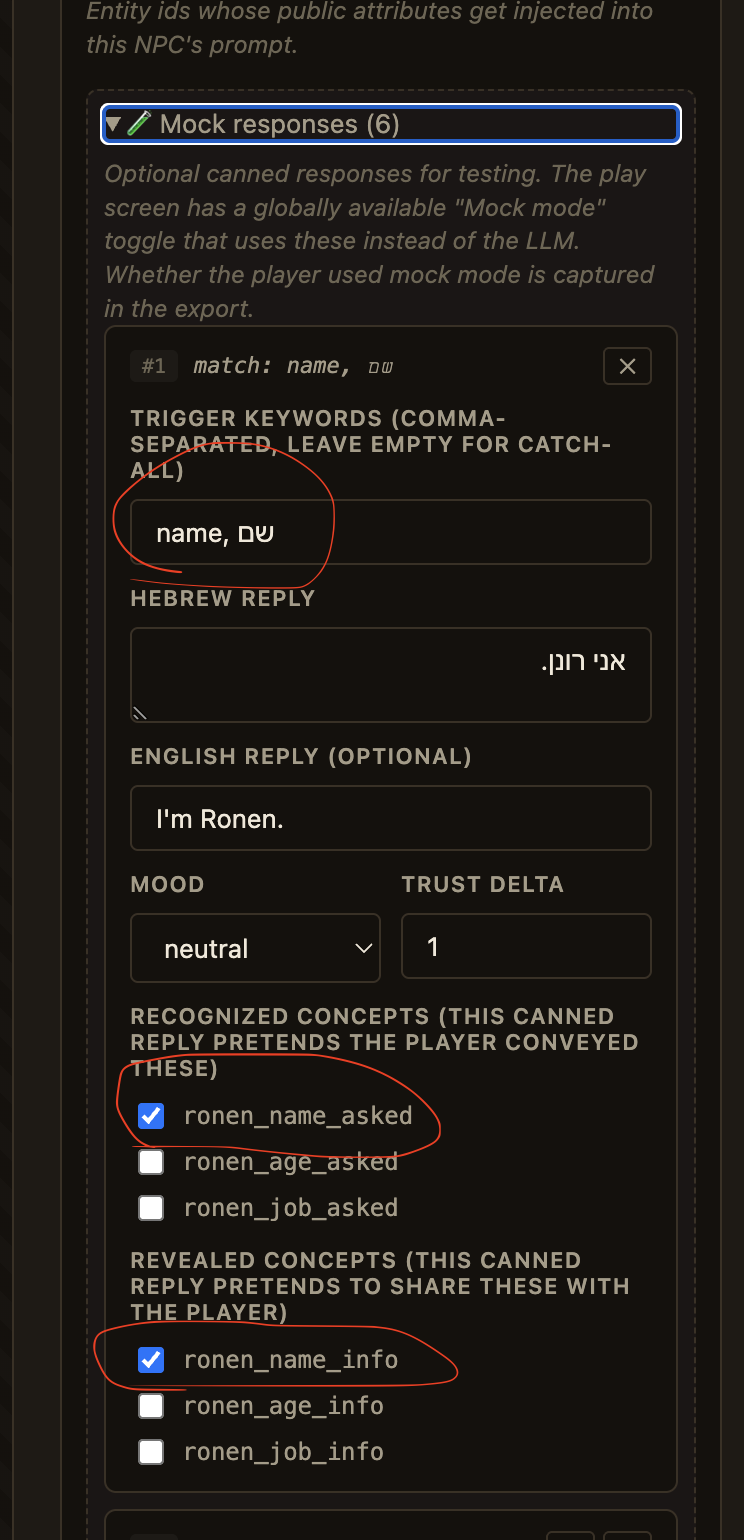
This is what allows you to test the game mechanics. In a real LLM mode, the AI would decide when the player has adequately conveyed the concept, and would then respond with the correct fact. This Mock Mode allows you to test that the LLM would work properly without actually using an LLM.
Concepts
Concepts are the facts in our world. Concepts are what actually drives the level forward - when a player discovers a Concept through conversation, it gives them information about how to proceed with the level. In some cases, when a player learns a Concept, it will end the game.
Triggers
A trigger is an event that fires when a certain action is performed: for example, picking up an object, giving an object to an NPC, or learning a certain Concept will cause a trigger. Look at the triggers configured for your level to understand how it works.
Ending the Game
When the game ends, the student will see a screen like this:
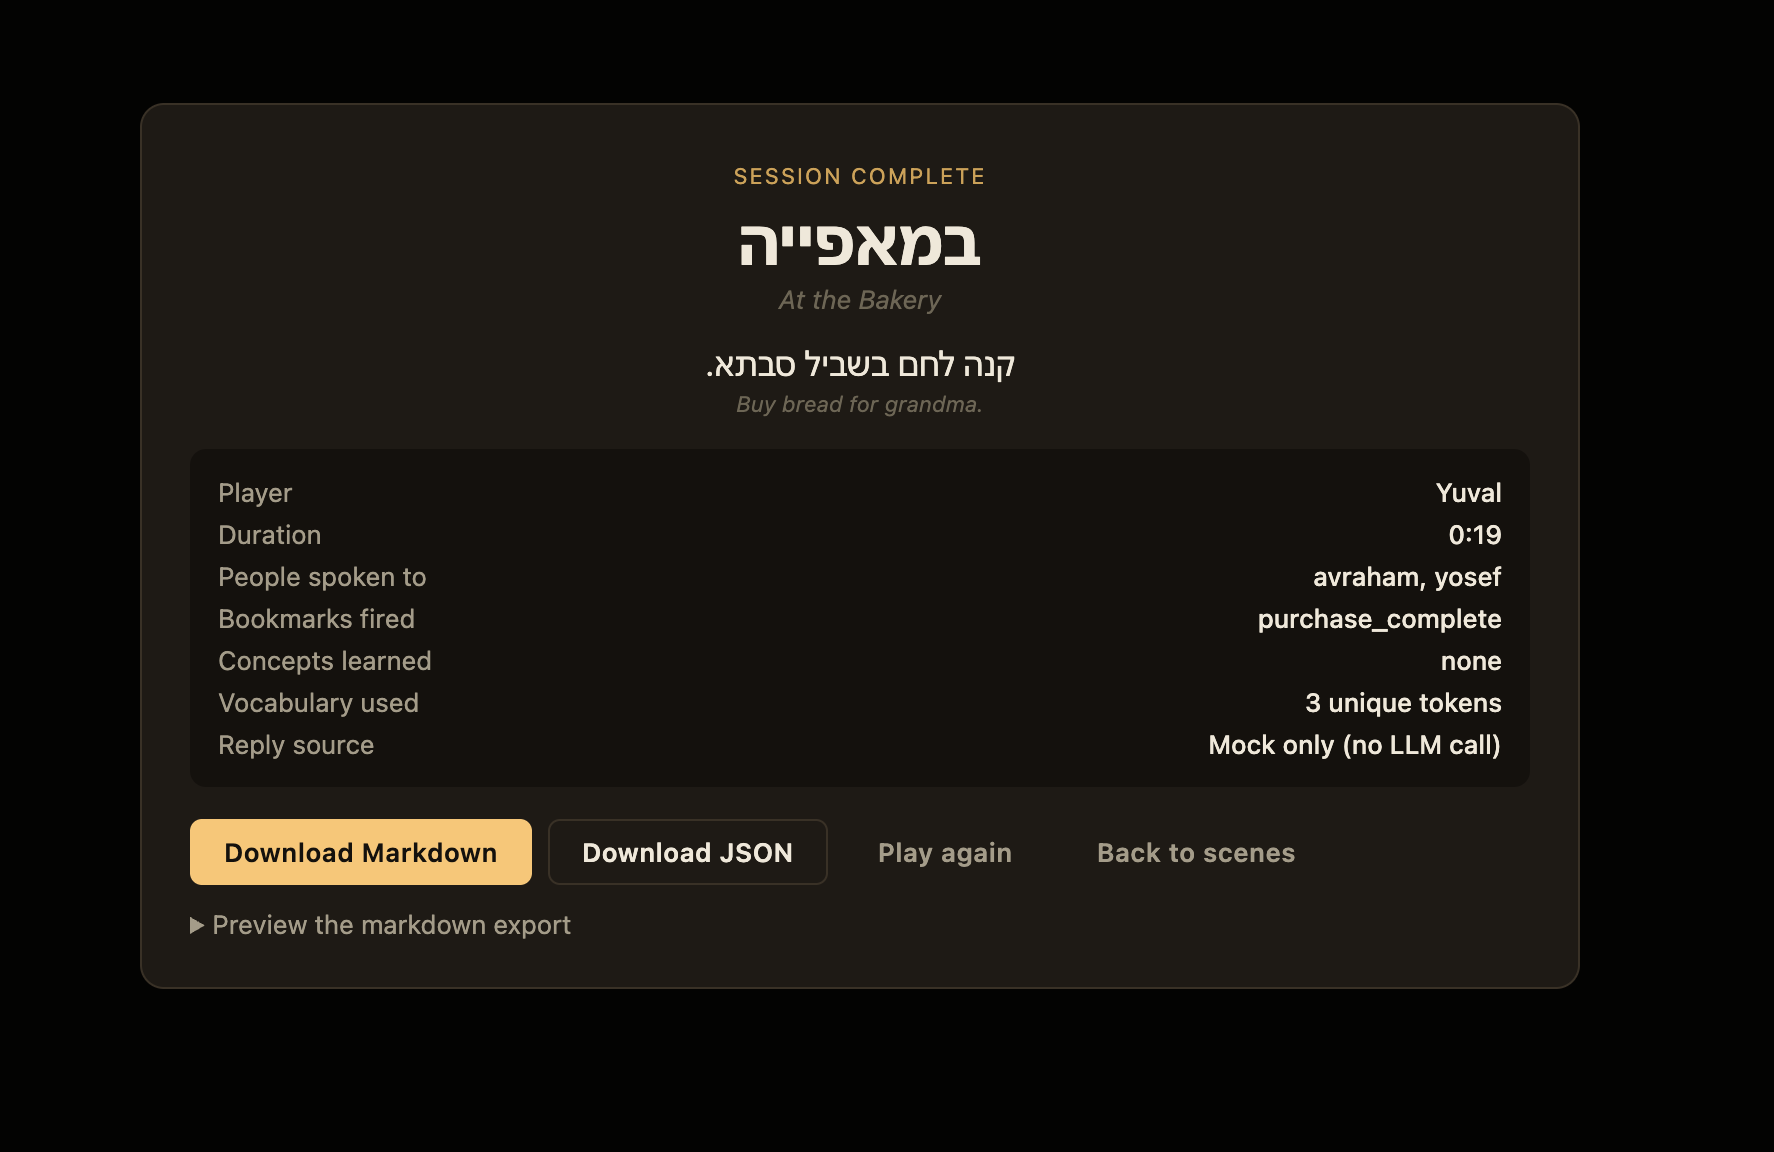
The button Download Markdown will allow you to download a full transcript of the level which you can grade. It includes:
- Metadata about the level duration, player, and mode (Mock Mode or real LLM)
- The transcript, including all events that triggered, concepts conveyed, etc.
- A Vocabulary list used by the player
Markdown is the format this blog post was written in. You can use this plugin on Windows to view Markdown here: MDViewer Chrome Plugin.
Conclusion
The game design works in 4 parts:
- Scene creation - use the SKILL to create a scene.
- Scene upload - import the SceneDefinition created from the SKILL to the game.
- Test the level in Mock Mode to make sure it works as expected.
- Tweak the scene using the Editor to get it just right before letting your students play.