The Next.js Framework

I’ve recently started using Next.js for a project. I come from the world of Backend, so I’ve encountered a lot of new concepts and I figured I would document my thoughts and learnings here. So let’s dive right in.
How The Heck Does Frontend Even Work?
As a Backend developer, I could talk all day about APIs, horizontal scaling, and database optimization. But when first started working on my latest full-stack project, I realized I was mystified about the workings of the Frontend: the browser, the event loop, async/await, and all the other good stuff that makes a website fun to use.
So in my quest to demystify some of these things, I started learning the Next.js framework. Next.js has a lot of crazy features that jumble a bunch of concepts together. So before diving into Next itself, let’s start with the basics of Frontend.
First - Let’s Talk About Web Applciations
If Backend is the world of data storage, transformation, and mutation, then Frontend is the world of user experience and actions. In order to interact with a site’s data, the user uses a web interface, which is typically HTML, CSS, and Javascript. The HTML gives the page a semantic structure - forms, buttons, nested sections, all that fun jazz. The CSS makes it pretty by programmatically targeting HTML and applyting styling. And Javascript makes it functional and interactive - it might update the HTML page structure, fetch or submit data, or do some other function.
One very simple way to think about it is: a web app is just software that “listens” to the user clicking around and typing on styled HTML pages.
Each interaction creates an “event”: this can be anything, like a user clicking a button or typing the next letter, or dragging a mouse. Events happen really quickly and the events build up quickly. How do we deal with that?
The answer is - the events just get added to a queue. That’s it. Just pop ‘em on the queue, no sweat! Javascript will churn through the queue for us. (How it’s done is really interesting.1)
But okay, we know what a web app is now. The Frontend’s job is to be the user interface, and translate user actions into our API verbs that act on our API nouns, all while displaying these concepts back to the user in real time.
So how does it really work?
Rendering Patterns
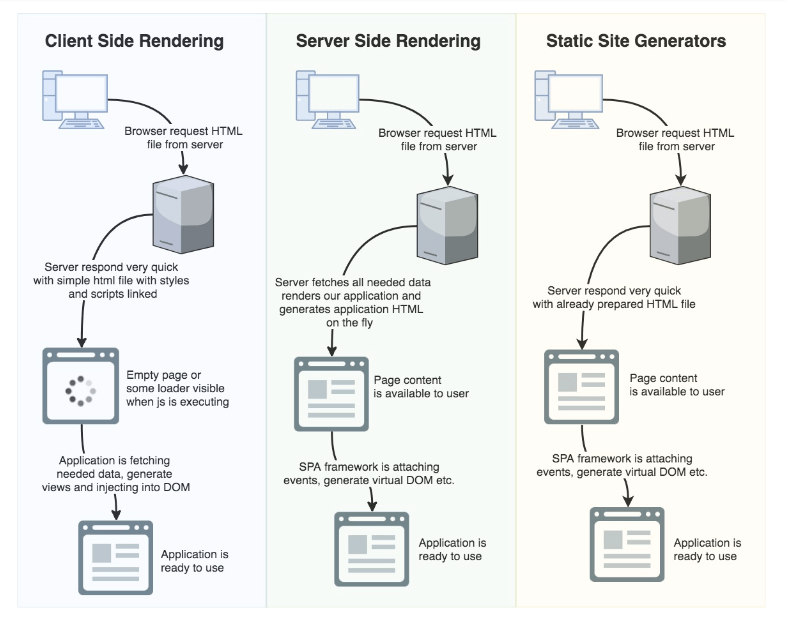
When the user types in a website URL, DNS will resolve the IP address for the URL and issue a request for the content at that address. The home page for the website in question might be some HTML page with the logo, a quick description, and links to other pages of the website. These would all be static assets, meaning they don’t change. They’re not dynamic. How often does the page logo or the link to the “about” page really change? Not very often. So, static assets are really easy to generate once, cache, and spread them around the world in CDNs for quicker distribution.
However it’s not 1999 anymore - we all know that the internet contains much more than just static assets. How do we deal with dynamic content? Dynamic content means content that depends on certain parameters - maybe the user can only see their own profile data, maybe the data depends on the time of day, or maybe the page itself is dynamically rendered through search parameters, so some specific subset of a big data list is expected. Since we can’t know this stuff in advance, the client needs to request these things dynamically, then serve it to the user.
This should be straightforward - just request whatever data you want! Problem solved, right?
Not so fast.
If we simply let the client request all the data it wants, this will introduce large latency overheads, as well as multiple round trips to the server. As shown in the diagram above, the client first just fetches the raw HTML with all the styles and scripts linked together. While the client works on fetching the required data, converting it to HTML, and rendering the HTML into a display in the browser, the user is just seeing a blank page. After all the JS executes, the page is finally done loading, and the user will see an interactive web page. In this case, we are letting the client request all the data, which might take multiple round trips. Imaging letting the client request the user info, waiting to receive it, and then using the user’s ID to request the user’s posts, waiting to receive those, and then using the post IDs to request the posts’ comments. That’s too much waiting. The client shouldn’t need to do all that work - we can move that to the server!
The server knows that the client is requesting a certain page, based on parameters, and maybe some authorization headers which identify the user. The server has access to the database or the APIs that we need to fetch the data, so why not save a few network round trips and just request all the data to be displayed before sending it back to the client? That way, the client receives all the HTML fully rendered and doesn’t need to request additional data. As we can see in the diagram, the server can return the HTML page, and then let the client take care of the remaining functionality.
The idea of letting the client do the work is called Client-Side Rendering (CSR), and if we move that work to the server, it’s called Server-Side Rendering (SSR). Both of these methods have their pros and cons, with a fundamental tradeoff between the two: if the HTML is rendered on the server, the client receives fully rendered HTML from the server and the experience is much smoother. But once the client receives the rendered HTML, it would want to interact with it, meaning that we need to have some Javascript in there somewhere. To solve this, we could have the JS “hydrate” the client.
Hydration is actually a really illustrative term here: imagine the server gives the client a dehydrated sponge. The client gets a whole entire sponge! But the sponge isn’t really useable right away, so the client needs to “hydrate” it with water to get it to its correct state. In this case, the dried sponge is the fully-rendered HTML page, and the water that hydrates the sponge is Javascript, which receives the rendered HTML and adds event listeners and other interactivity to it to make the client interactive.
Hydration is a whole topic in itself, so let’s just jump to how Next.js handles hydration for its components.
The Next.js Framework
Next.js gives developers the best of both worlds - fully rendered HTML served to the browser, with the ability to selectively hydrate interactive components.
The key word here is “selective”. Next.js has a neat concept of Server Components and Client Components, which allow developers to choose which parts of their application get rendered on the server, and which get rendered on the client. If you want to build up intuition for React Server Components from first principles, there’s a good article2 in the References section at the bottom of this article.
The Next.js Network Boundary
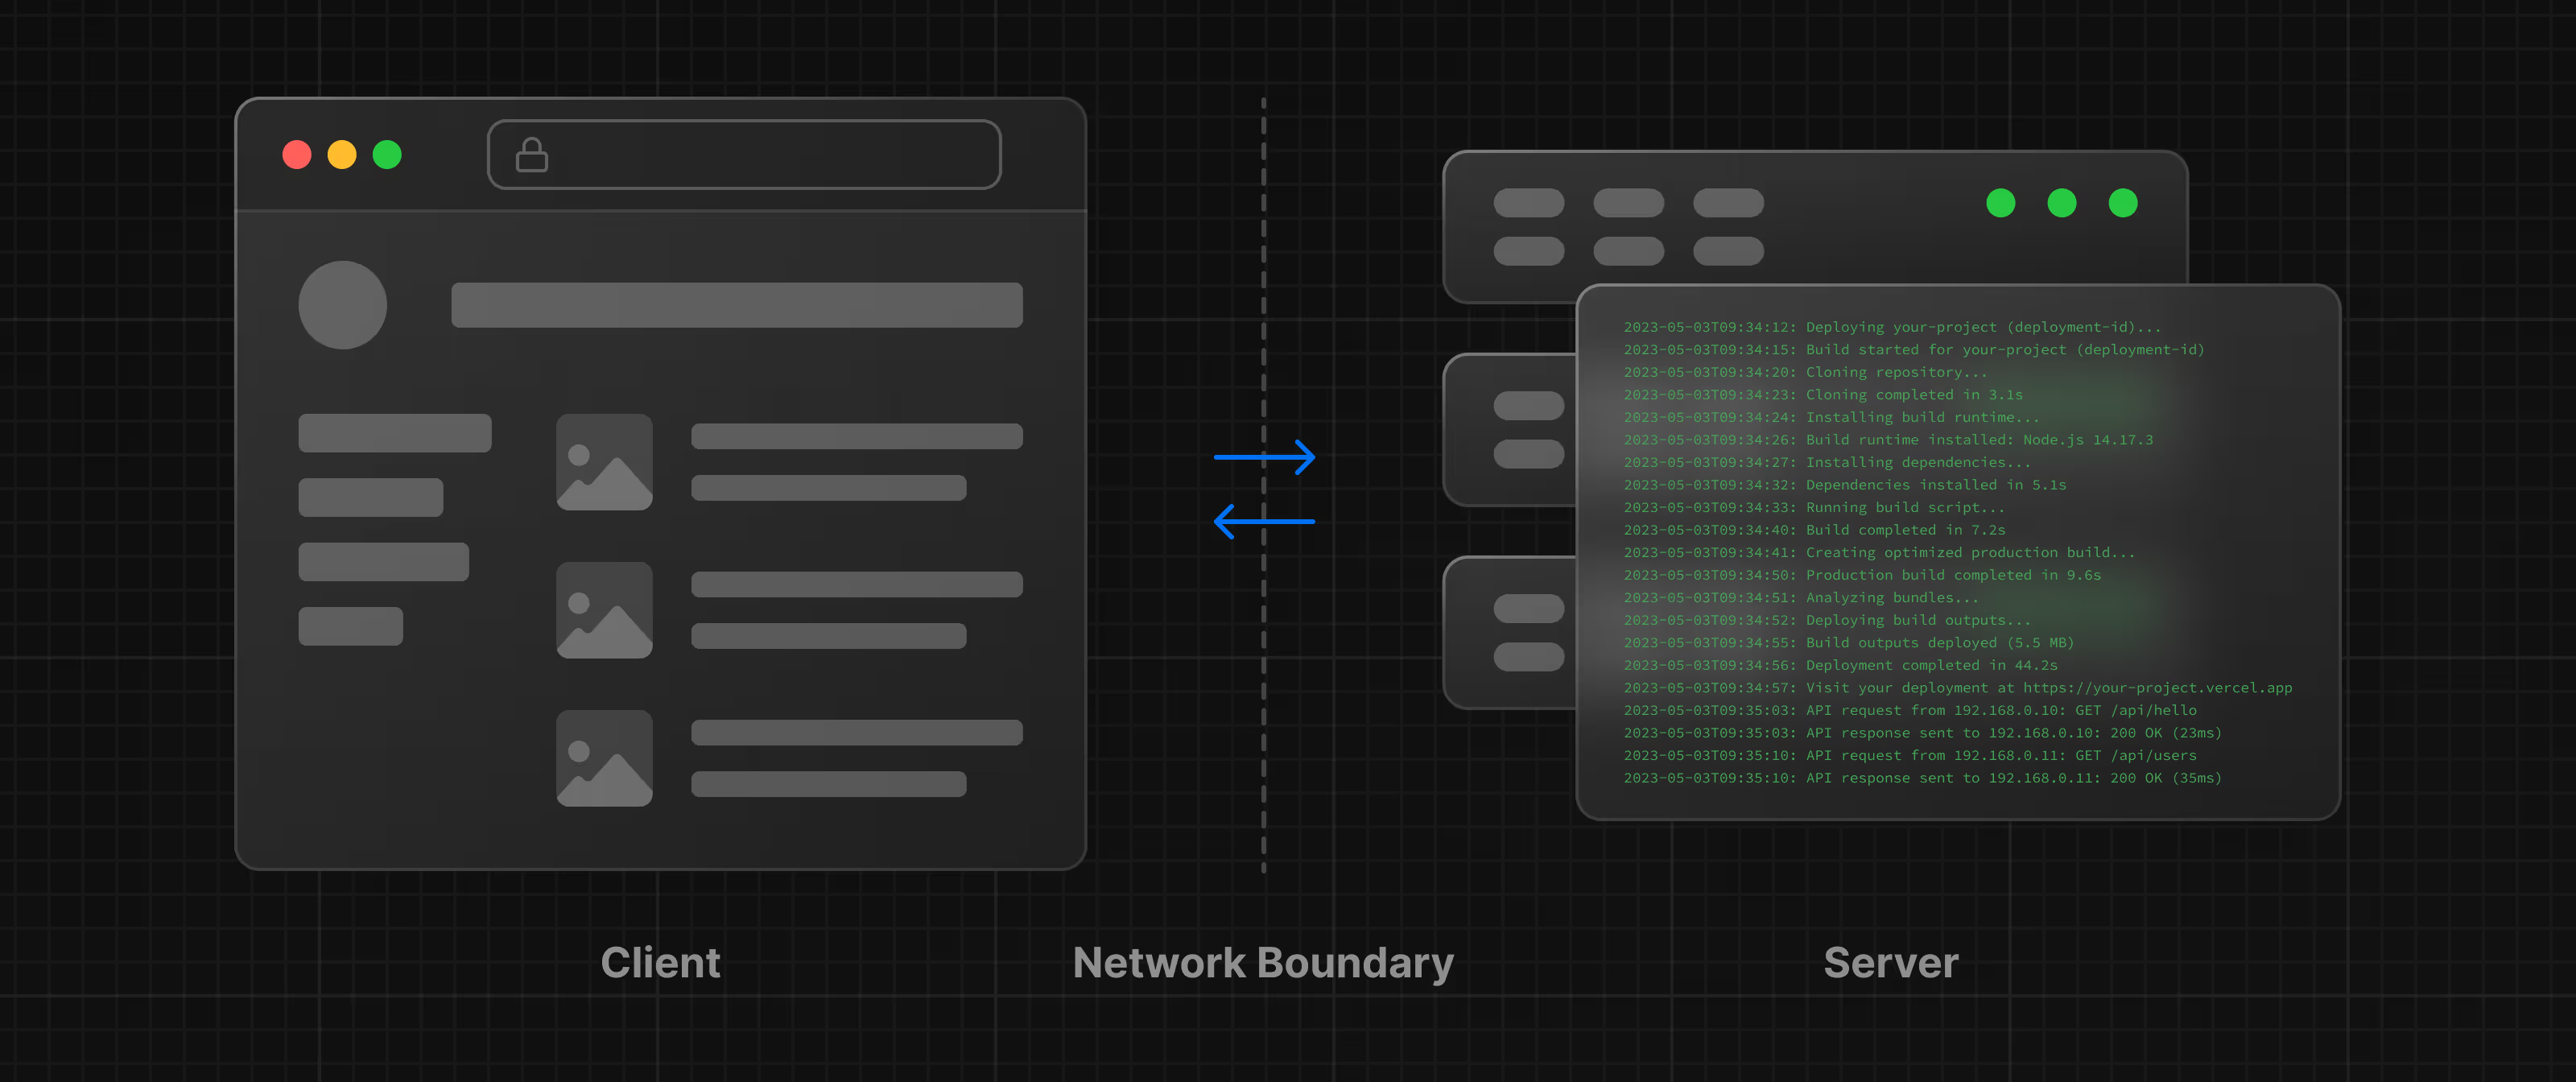
A Next.js app that is deployed non-statically will have a Next.js server, which is just a NodeJS server with some added cruft. The server has access to the database or the APIs or whatever else is needed for the application to serve data. In the above picture, the server exists behind the network boundary, which is a conceptual line separating the client from the server. This image, though very simple, is very important to keep in mind when developing with Next.js.
When writing components or pages in Next.js, the default component will be a Server Component, meaning that the entire component will be pre-rendered on the server. This is very convenient, becuase it allows the developer to use server-side environment variables, APIs, and caches to fetch data, and then render that data directly into HTML.
But what if you need some sort of client-side functionality, like running a callback on a button click? If you try to run the following code in Next.js, you’ll receive a warning:
export default function HomePage() {

    return (
        <div>
            <h1>Home Page</h1>
            <button onClick={() => console.log('hello')}>
            Print Hello
            </button>
        </div>
    );
}
But why? This looks like a perfectly valid React component, right?
Yes, but remember - React Server components are the default in Next.js. So client-side functionality like onClick is not supported on the server. It’s a client action, and must therefore be inside of a Client Component.
Okay… so how do I do that? Easy! Just include the 'use client' directive at the top of the file.
'use client'

export default function HomePage() {

    return (
        <div>
            <h1>Home Page</h1>
            <button onClick={() => console.log('hello')}>
            Print Hello
            </button>
        </div>
    );
}
Great, no more error! But, now what we did was opt the entire component into Client-Side Rendering, meaning that the client will need to render out the div and h1 tags. In this case, it’s a very small amount of work, but in larger applications, we want the server to render as much of the content as it can before passing the torch to the client to finish the job. So how can we accomplish that? Let’s separate out the code into a Client Component and embed it into the Server Component.
// In /app/components/PrintButton.jsx

'use client'

export default function PrintButton() {
    return (
        <button onClick={() => console.log('hello')}>
        Print Hello
        </button>
    );
}
// In /app/page.jsx

import { PrintButton } from '@/app/components/PrintButton';

export default function HomePage() {

    return (
        <div>
            <h1>Home Page</h1>
            <PrintButton />
        </div>
    );
}
Awesome - now Next.js will serve the fully rendered HTML for the home page, except it will leave a placeholder for the <PrintButton /> component. Then, when the client receives the payload from the server, it will know to inject the Client Component into the correct slot. It does this using the React Server Component (RSC) Payload. This process is really cool and I encourage you all to learn more about it.3.
There’s a bunch of nuance as to how best to structure applications and how to nest Client Components inside of Server Components. The main thing to know is that nesting Client Components inside of a Server component is usually what you’ll want. In the outer Server Component, you fetch the data you want, and then render everything into the HTML in the return block. You can then embed Client Components and pass down the data as props. This is a secure and opaque way to feed data to the client without revealing the underlying API.
However, a common anti-pattern is to embed a Server Component inside of a Client Component. Any component that is imported into a Client Component will itself become a Client Component, so avoid this mistake. There is a package called server-only that allows you to annotate Server Components to throw errors if it’s ever used in a Client Context.
Although there’s much more to be said on the Client/Server Network Boundary in Next.js, let’s move on to Server Actions, which in my opinion, is the best thing about Next.js.
Server Actions
Next.js makes the Client and Server Components from React pretty easy to use and to reason about. This really helps us read and display data in the most efficient way possible. But as a Backend developer, I’m also interested in creating, updating, and deleting data, rather than just reading it.
Normally, if I wanted to accomplish something like updating a post, I’d create an POST API endpoint and call it from the client, then handle the data refetching on update. But Next.js has one cool new feature that can completely obscure the REST API from the user and make it almost trivial to implement data mutation: Server Actions!
A Server Action is just an async function that’s executed on the server. Sounds simple, but the way Next.js handles them has a lot of nuance, so let’s take a closer look at how they work.
How To Use Server Actions
Let’s define a file called actions.ts containing one simple Server Action that inserts a row into our database:
// /app/actions/actions.ts

'use server';

export function insertData(formData: FormData) {
    const data = formData.get('data');
    const db = createDbClient(...);
    await db.insert(data);
    revalidatePath('/posts')
};
The function itself takes in a formData object, which acts just like a dictionary. As you can see, we insert the data and then call this revalidatePath function - this is the Server Action’s way of busting the page’s cache. Alternatively, we could redirect to a different page, return an object, or throw an error which would be handled by the nearest error.js file.
The 'use server' directive at the top of the file tells Next.js that all exports from the /app/actions/actions.ts file are Server Actions. This directive should not be confused with the default (ie. empty) Server Component directive; do NOT use 'use server' on Server Components.
Okay, so we created the insertData Server Action, which will run on the server when invoked, and it has access to all the server data, such as the createDbClient function in this example. For that reason, Next.js suggests adding validation for authorization on all your Server Actions, and to basically treat them as any other public endpoint. Good to know!
We can now invoke this function from Server or Client Components. Let’s create a button to call the function from the Client side:
'use client';

import { insertData } from '/app/actions/actions.ts';

export default function InsertButton() {
    return (
        <button onClick={() => insertData('Hello')}>
        Insert 'Hello'
        </button>
    );
}
Alternatively, we can call this action from a form using the action or formAction props. This will be left as an exercise to the reader. (Sorry, I read too many math textbooks in college.)
So Server Actions are simple enough to use. But how do they really work?
What’s Really Going On?
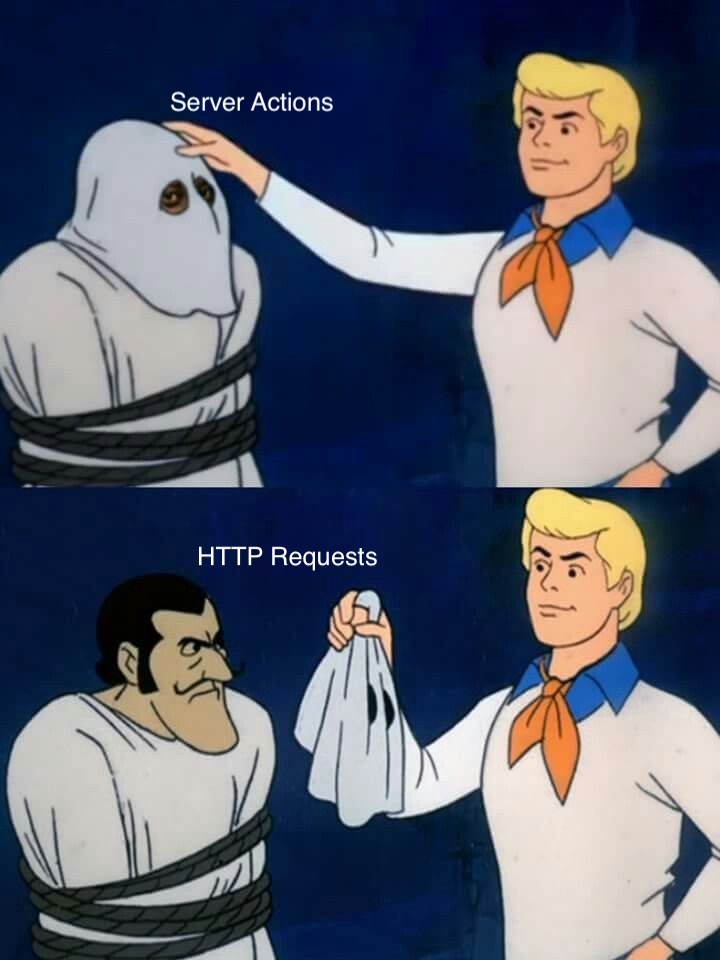
Okay, I’m going to level with you - Server Actions are really just HTTP requests in disguise, meaning their inputs should still be treated as insecure and validated properly. So assuming you’ve secured the Server Action properly, let’s see which measures Next.js takes to enhance security on them. Let’s walk through the lifecycle of a Server Action.
Before deploying your Next.js app, you’ll need to run npm run build, which will build and bundle the app to make it ready for production. One of the things it does is prune unused Server Actions! This is called dead-code elimination, and is used to prevent public access. All the Server Actions that are referenced by their ID somewhere in the code do get deployed, so part of the build process involves statically securing these Actions.
Next.js claims that it:
“creates encrypted, non-deterministic IDs to allow the client to reference and call the Server Action. These IDs are periodically recalculated between builds for enhanced security… The IDs are created during compilation and are cached for a maximum of 14 days. They will be regenerated when a new build is initiated or when the build cache is invalidated. This security improvement reduces the risk in cases where an authentication layer is missing.”
Fascinating!
Another part of the build process is preparing Client Components for executing Server Actions. Next.js wants to ensure that only the Client Component is able to execute Server Actions, rather than allowing any client, such as Postman or a cURL command. When a Server Action is imported into a Client Component, Next.js will wrap the Server Action with a special wrapper that allows for the request to be properly formatted.
When the Server Action is invoked from the Client (ie. from a form submission of a button click), Next.js serializes the function and its parameters. At this stage, Next.js will actually generate a random, temporary, internal endpoint on which to execute the Action. This endpoint is intended to be unpredictable and is not a public route (ie. not in /api/*).
Next.js has mechanisms to check the origin, CSRF token, headers, and other aspects of the incoming request, to ensure that it came from the client.
Finally, Next.js will receive the request, deserialize the function and its arguments, and invoke it like a normal server function. The runtime of the Server Action is inherited from the page or layout from which they’re invoked.
Conclusion
Next.js is a powerful Frontend framework that blends React Server-Side and Client-Side Rendering into a hybrid pattern that gives developers the best of both worlds. It uses React Server Actions to simplify data mutation, removing the need for full-sized API endpoints. These Server Actions are secured through a variety of clever means, preventing repeatable attacks against the internal data processing part of the server.
We barely scratched the surface in this blog post, so I’d encourage everyone to try it out themselves. See you all next time!
References:
- MDN document on how Javascript ensures forward progress
- This deep dive: RSC From Scratch
- This article on the Forensics of React Server Components